
When all else is said and done the most important consideration for the house was that it is fun to use. Children viewing the house at events had to feel compelled to play around with it and control things / turn them on and off.
It was therefore important to have a controller that kids could use easily and wanted to use.
I built 2 different controllers, the first of which was based around a prototype analogue joystick that Sciencescope kindly put together for me:
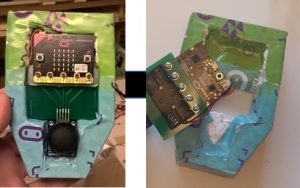
The housing is polystyrene reinforced with an a4 sized micro:bit sticker (the same one used on the boxes that we sent to teachers in Q1 2016 with some micro:bits).
The user clicks up and down on the joypad to change the item that is to be controlled, then clicks left and right to change the setting. In general kids got the hang of using this control quite quickly.
I was not happy with this controller though: the method of changing the item always needed to be explained, and it was difficult to know which item was currently in focus (the name scrolled across the micro:bit screen, but that is not easy to read). The housing was also a bit tatty and the joypad was not secure so would fall out if inverted (although pretending to be upset cos someone had ‘broken’ the controller was always good for a laugh)
This is what prompted me to build the philtronic2000, which is pictured below:
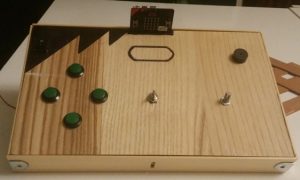
I didn’t use this much for the house – kids preferred the joypad controller. I have used it in other projects though, and have written a stand-alone blog about it, so I won’t go into more detail here.
Next: The micro:bit house (9) – code
The micro:bit house blog has 10 separate chapters:
- The micro:bit house
- The micro:bit house (2) – design
- The micro:bit house (3) – structure
- The micro:bit house (4) – construction
- The micro:bit house (5) – interior
- The micro:bit house (6) – furniture
- The micro:bit house (7) – electronics
- The micro:bit house (8) – controllers
- The micro:bit house (9) – code
- The micro:bit house (10) – wrap-up