
The house is easy enough to put together and break up – I can do it in less that 5 minutes without breaking a sweat:
Step 1: Adding the side walls to the floor
When I built the floor I was careful with the placement of the wooden struts I added.
These are spaced so that the walls fit snugly in between them – they are placed 2 louvre widths apart. I also had to take care to ensure that the inside one was shorter than the outer vertical supports on the side walls:
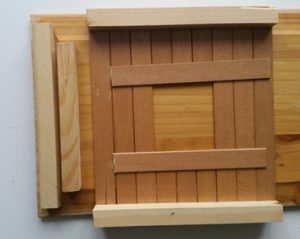
It is then very easy to attach the side walls to the floor, as you can see below:
Step 2: Adding the back wall
The back wall is basically free-standing – it fits snugly next to the side walls but is not fixed to the floor – it is locked in place by the ceiling.
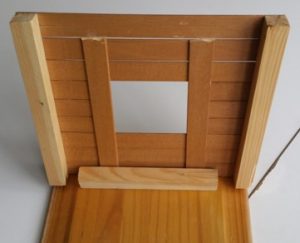
Place the back wall to the rear so that the side supports line up with the side supports of the side walls:
You may need to support this until you have the ceiling up.
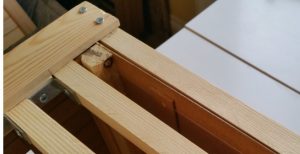
Step 3: Adding the ceiling
The ceiling holds the walls in place and gives strength to the structure – it is important to ensure it is placed correctly.
The gap designed into the underside of the ceiling should fit the edges of the side walls snugly:
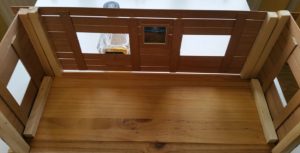
In addition, the last strut of the ceiling sits behind the back wall to keep it in place:
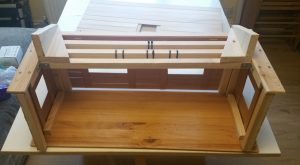
Once the ceiling is in place the structure will stand firm.
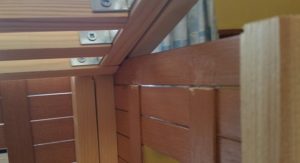
Step 4: Putting up the roof
Did I mention the wedges? These are angled chunks of wood used to ensure the roof is above the ceiling (where a lot of the electronics are stored) and sits at a roofly angle. Add the wedges to the ceiling as is shown below:
The roof then fits neatly on top of the wedges:
![]()
Note how the strut on the underside of the roof locks with the edge of the wedges to ensure that the roof doesn’t slide off the back.
The roof is easy to take on and off – it needs to be to give access to the electronics located on the ceiling.
Step 5: Putting it all in a bag
One of the strengths of the house is its portability – all the structural components (except the wedges) fit snugly into a single bag and are light enough to carry easily:
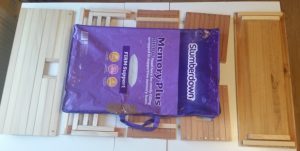
I got really lucky on this – my better half had recently bought some new pillows and, me being me, I’d hoarded the zip up pack they came in. It was such a perfect fit that I’d like to be able to say I planned it. I didn’t.
Sadly the bag has taken a real battering and doesn’t have long left – the pillows still have a lot of life in them though! If anyone happens to buy the brand of pillow shown in the pic and doesn’t need the bag it came in please get in touch!

Next: The micro:bit house (5) – interior
The micro:bit house blog has 10 separate chapters:
- The micro:bit house
- The micro:bit house (2) – design
- The micro:bit house (3) – structure
- The micro:bit house (4) – construction
- The micro:bit house (5) – interior
- The micro:bit house (6) – furniture
- The micro:bit house (7) – electronics
- The micro:bit house (8) – controllers
- The micro:bit house (9) – code
- The micro:bit house (10) – wrap-up